
Idee creative
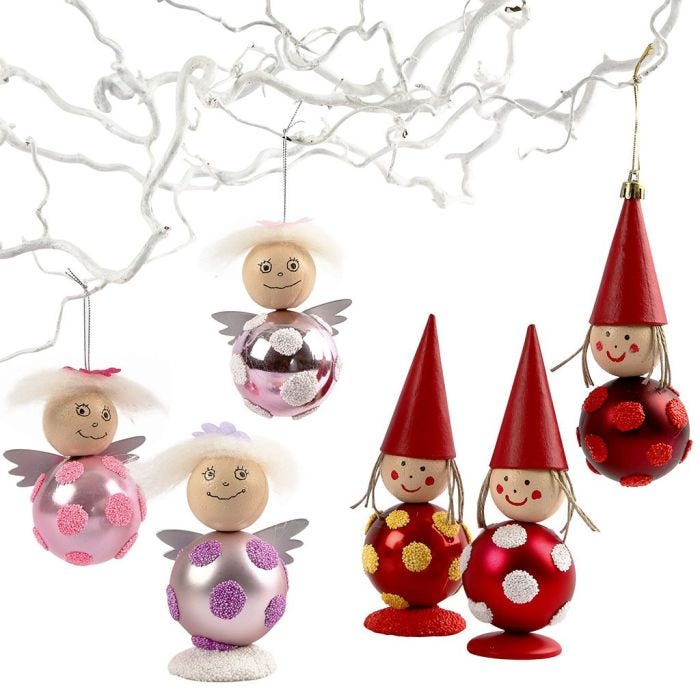
Bauble Angels and Pixies
#v11131
Elfi e angioletti realizzati con palline di Natale decorate con Foam Clay. Pittura delle sfere di polistirolo con Plus Color per la testa e un cono per il cappello. Realizza per gli angeli dei capelli di lana e delle ali. Per farli stare in piedi, incolla un bottone in legno sul fondo.
#v11131
Come farlo
1.  Paint the polystyrene balls skin colour and the cones red.
Paint the polystyrene balls skin colour and the cones red.2.  Roll small balls of Foam Clay and push them flat on the baubles.
Roll small balls of Foam Clay and push them flat on the baubles.3. 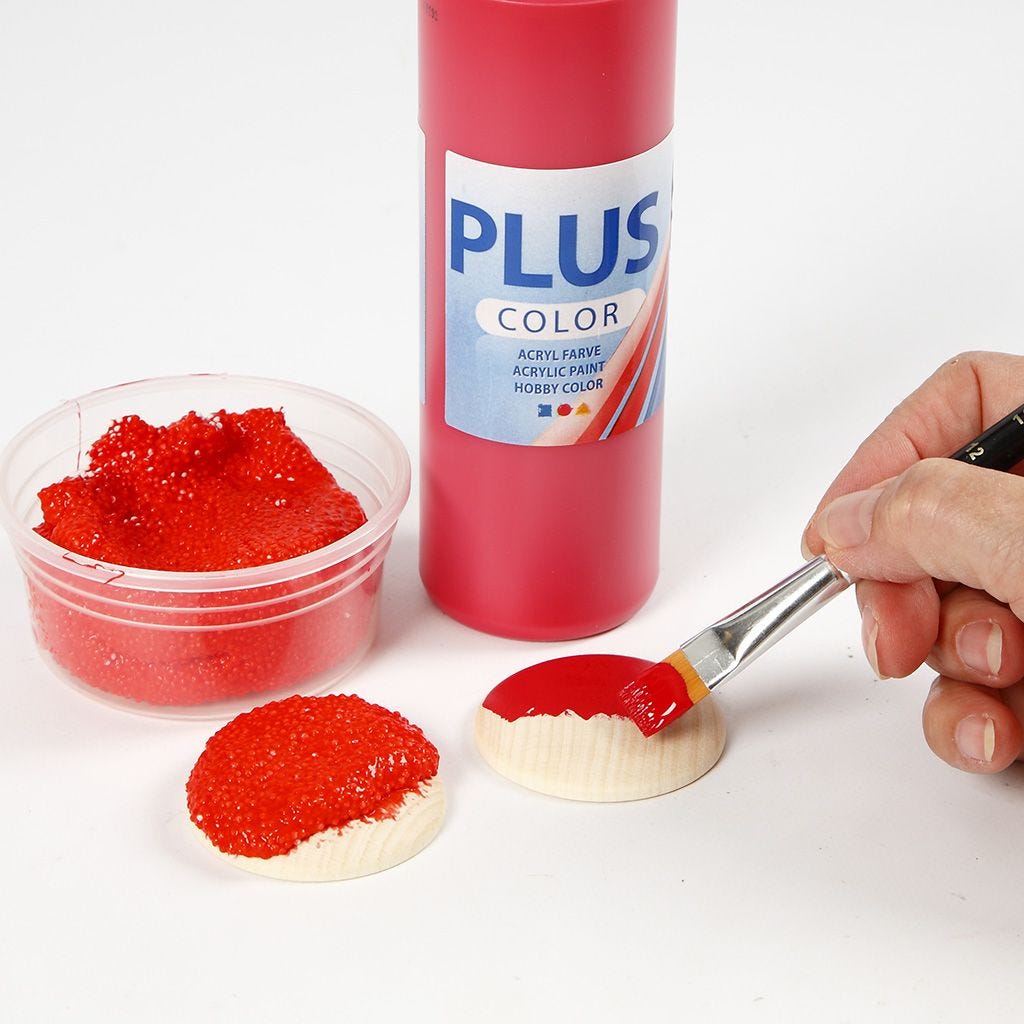 Paint or push the Foam Clay onto the wooden buttons which are to be used as feet.
Paint or push the Foam Clay onto the wooden buttons which are to be used as feet.4. 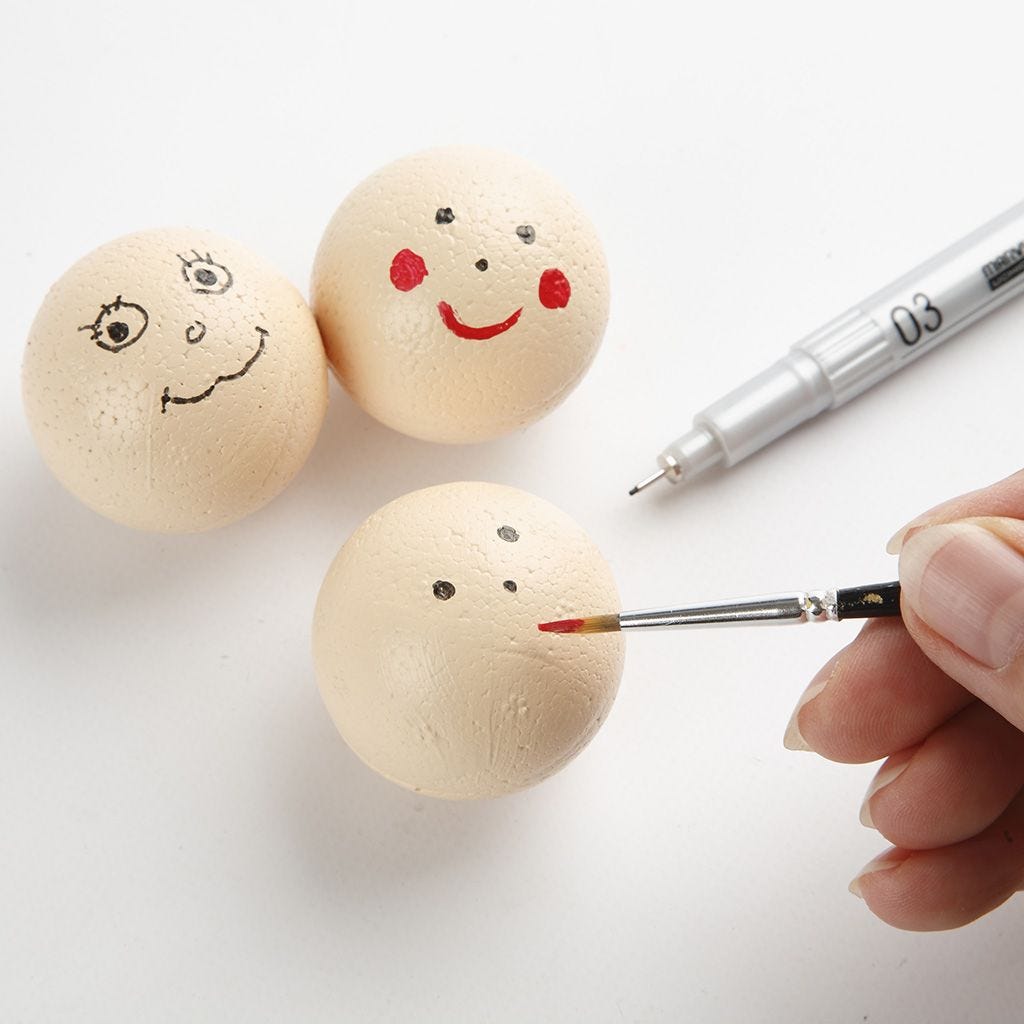 Draw facial expressions using a thin pen and red paint.
Draw facial expressions using a thin pen and red paint.5. 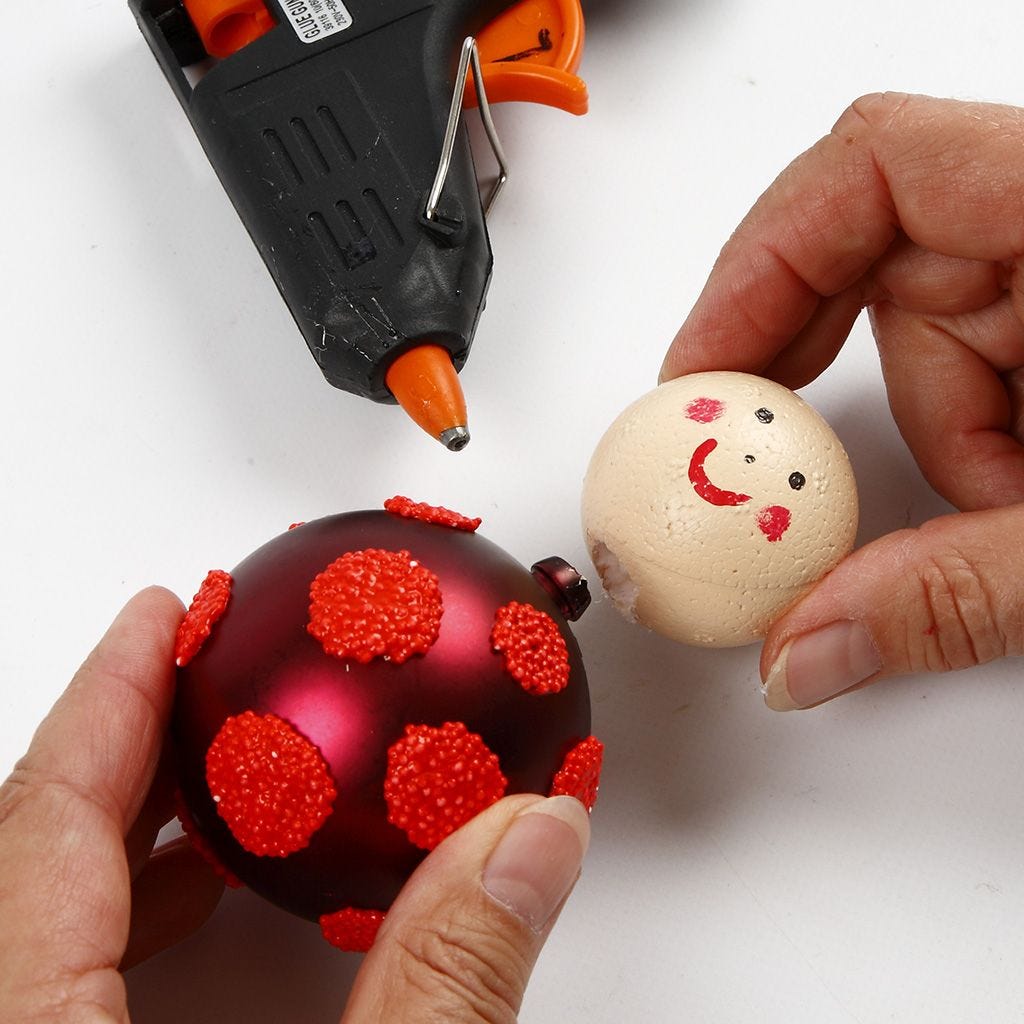 Take the hanger out of the bauble. Push the head down onto the collar and take it out again. Glue the hole before fixing the head.
Take the hanger out of the bauble. Push the head down onto the collar and take it out again. Glue the hole before fixing the head.6. 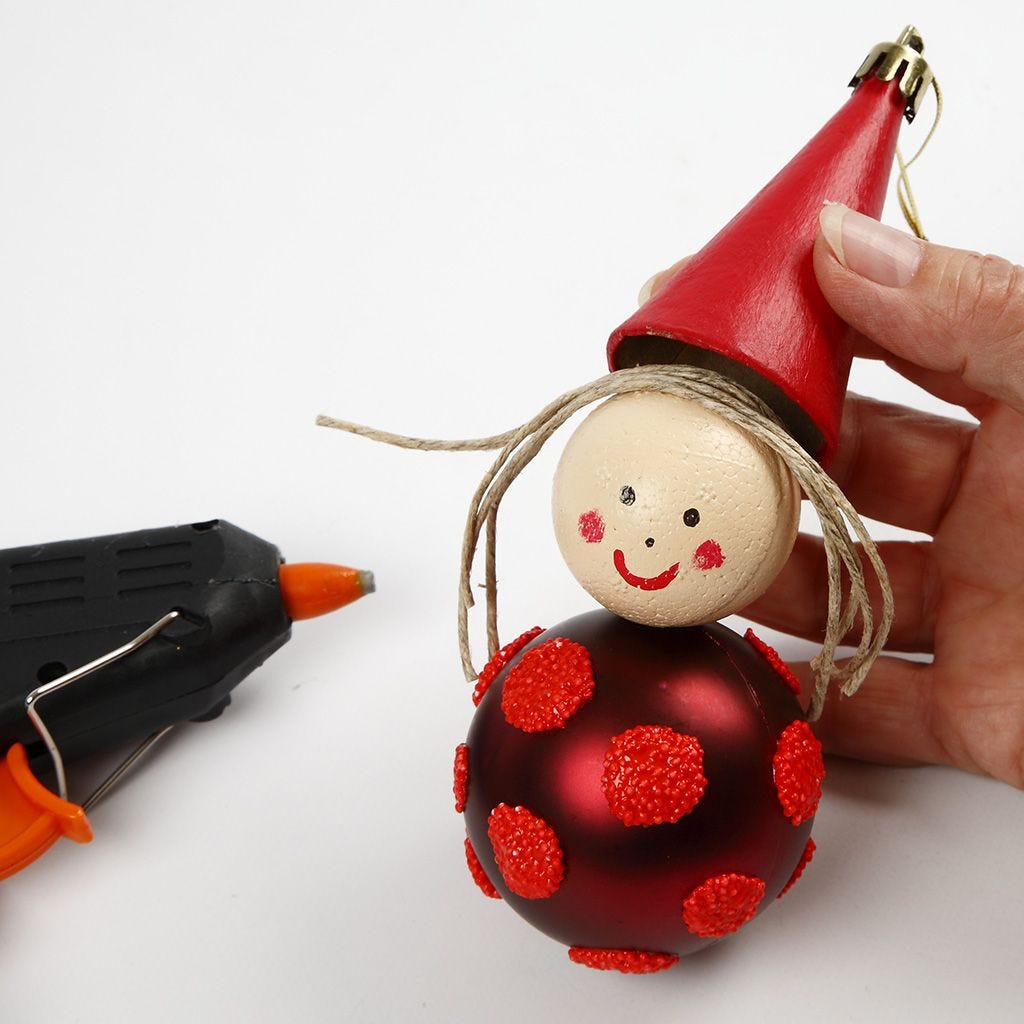 Glue the hanger onto the hat if you want to hang the pixie. Cut pieces of twine for hair and glue it on with the hat. If you want the pixie to stand, glue it onto a wooden button.
Glue the hanger onto the hat if you want to hang the pixie. Cut pieces of twine for hair and glue it on with the hat. If you want the pixie to stand, glue it onto a wooden button.7. 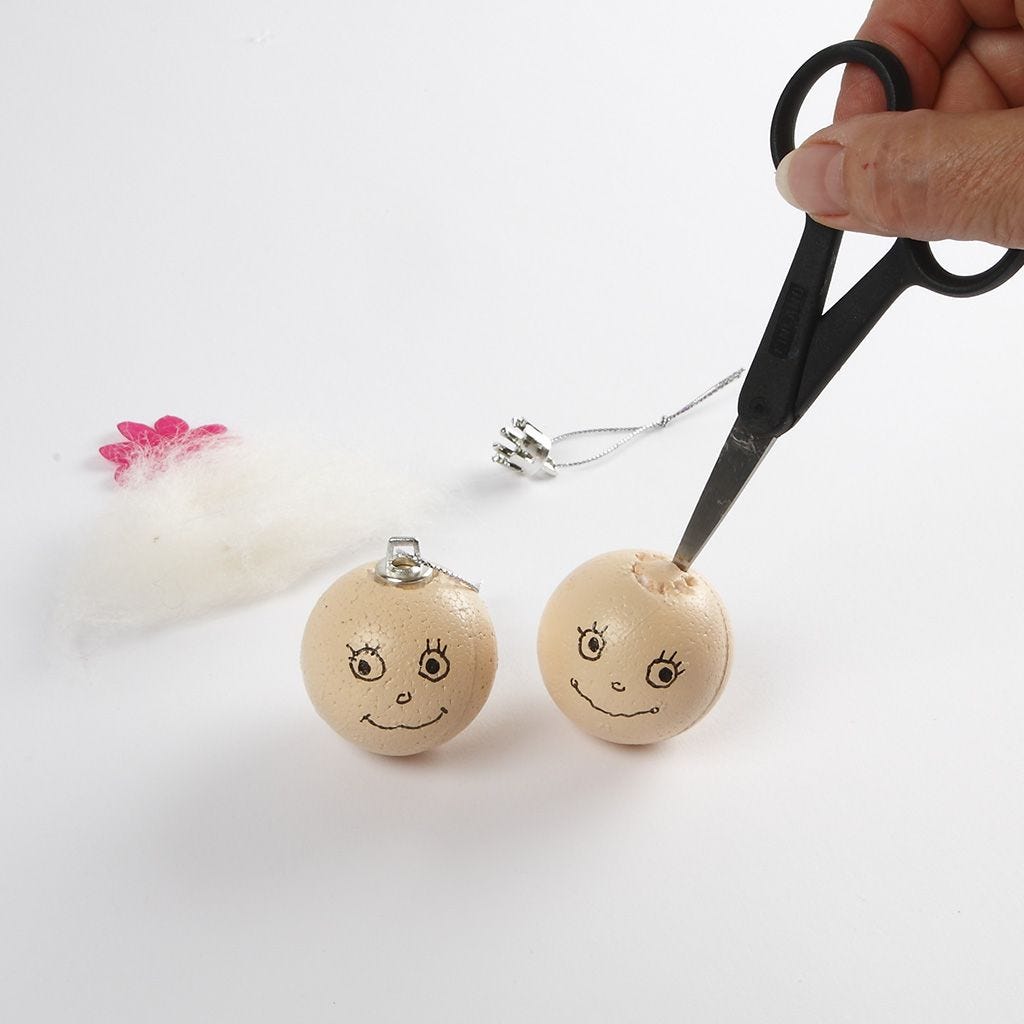 When making the angels push the hanger onto the head to mark the holes. Make the holes with the pointy end of the scissors. Now you can push in the hanger with a bit of glue. Part the hair and arrange it so it covers the piece of string. Also thread the organza flower onto the piece of string and glue it in place. If you want the angel to stand, glue it onto a wooden button and cut off the piece of string.
When making the angels push the hanger onto the head to mark the holes. Make the holes with the pointy end of the scissors. Now you can push in the hanger with a bit of glue. Part the hair and arrange it so it covers the piece of string. Also thread the organza flower onto the piece of string and glue it in place. If you want the angel to stand, glue it onto a wooden button and cut off the piece of string.8. 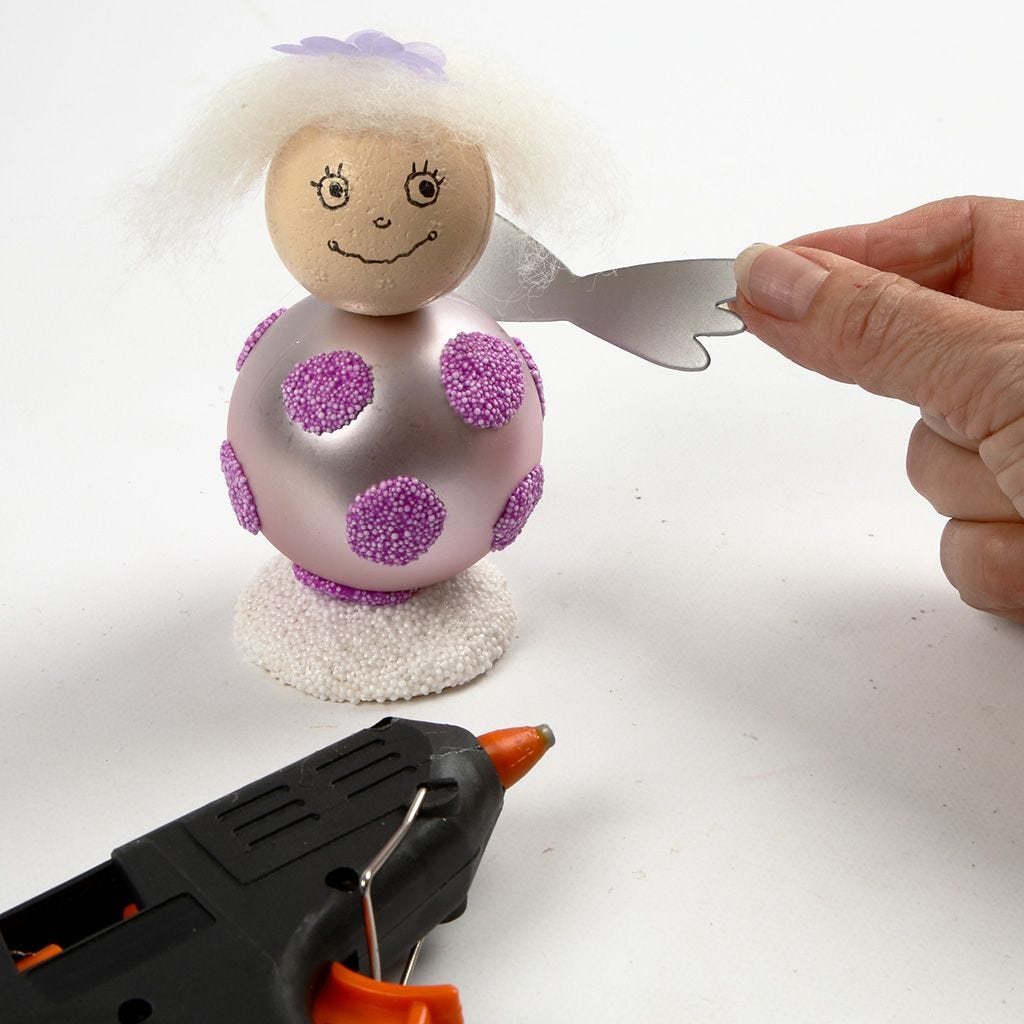 Glue on the wings.
Glue on the wings.Vai anche ad esplorare
