Idee creative
A Join the Party Card
#v11291
A stamped and heat embossed design, decorated with eyelets, metal tags, ribbon and rhinestones and put onto a pearlescent card. A fun card to make both for girls and boys with a few fun and powerful techniques.
#v11291
Come farlo
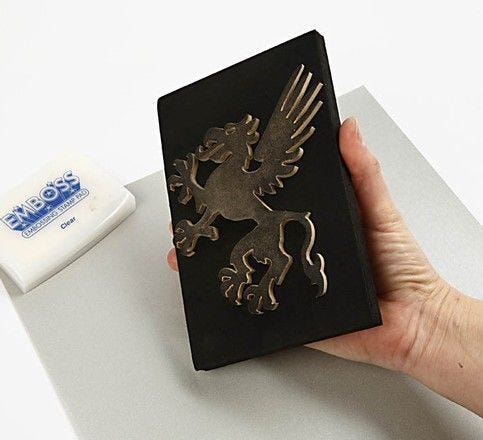
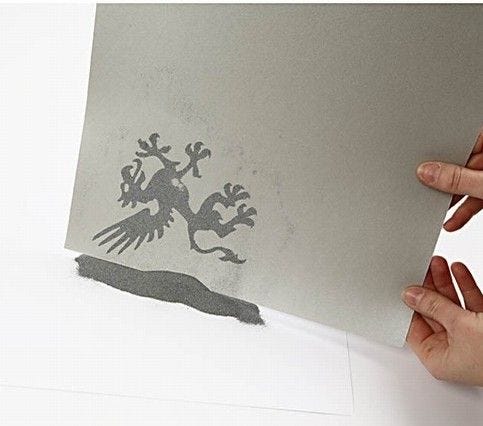
1 Dab the stamp design with embossing glue.
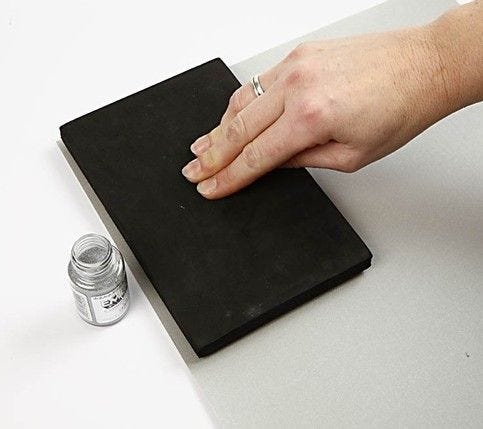
2 Remove the lid from the embossing powder so that it’s ready beside you. Make sure to have an ordinary piece of paper underneath the object you want to emboss. Press the stamp onto your object. Make sure to press evenly so the entire design is transferred.
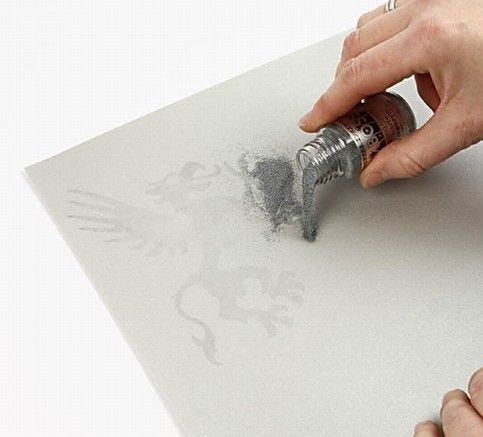
3 Sprinkle the embossing powder over the printed design immediately.
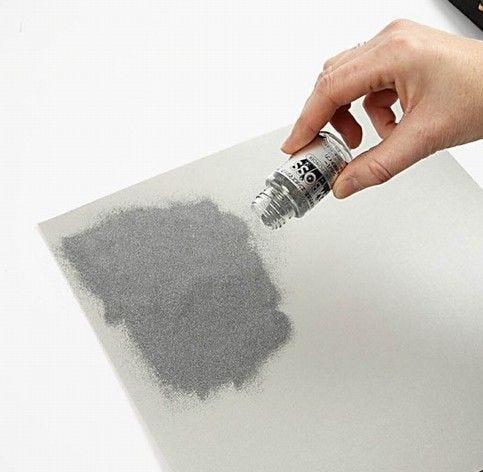
4 Pour plenty on, so the entire design is covered whilst the stamped print is wet.
5 Remove excess embossing powder from the design by tapping it gently against the table. Blow away the last bits if necessary. Alternatively, you can remove the "errors", with a fine, soft brush.
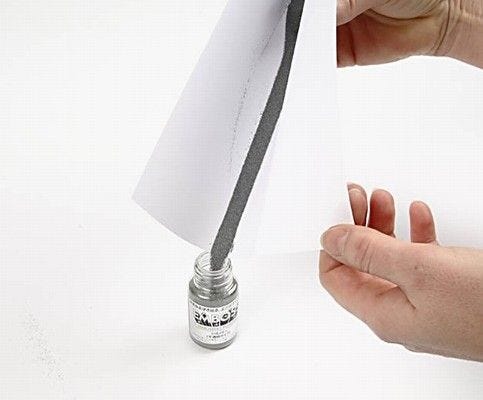
6 Pour the excess powder back into the tub.
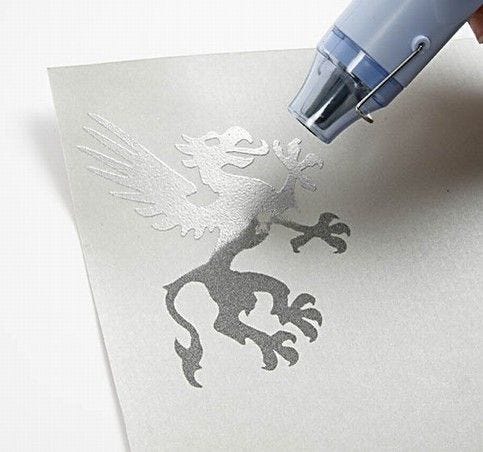
7 Turn on the heat gun and hold it approx. 20cm from the area you need to heat. After a few seconds, a miracle happens; the powder melts. Heat over the entire stamped area little by little. The design cools and solidifies in 15 seconds after which you can touch it.

8 Roughly cut out the design. Cut a piece of card measuring 9.5 x 14cm.
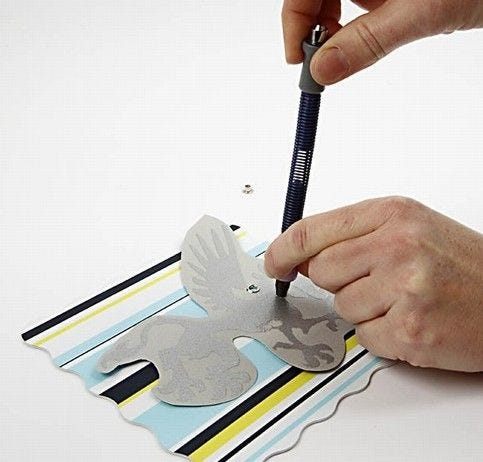
9 Fix eyelets around the dragon's neck with an eyelet punch. One end is used to make the actual hole.
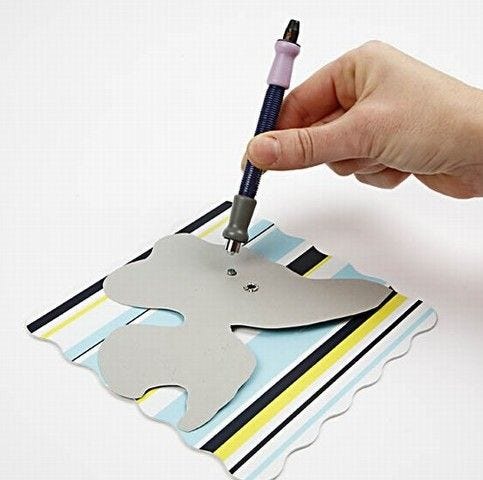
10 The other end is used for fixing the eyelet from the back. Punch hard a few times until the back of the eyelet is flat and attaches securely around the hole.
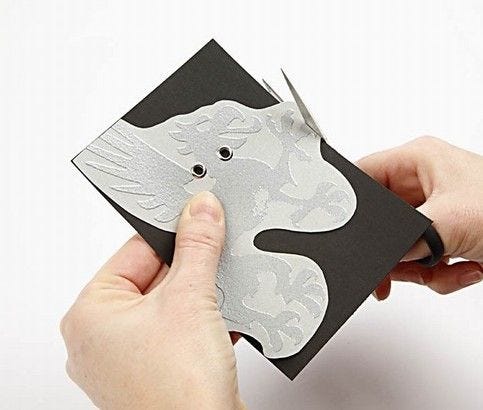
11 Hold the cut out dragon up against the black card and – keeping the cut flush – cut off where the dragon protrudes.
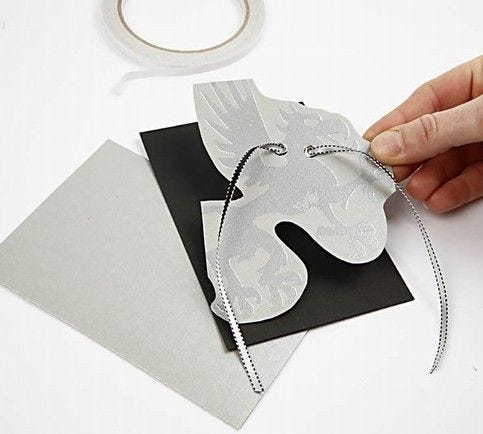
12 Put decorative ribbon through the eyelet holes and attach the dragon onto the black card with double-sided adhesive tape.
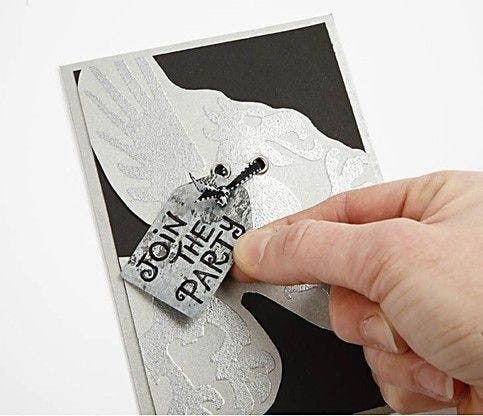
13 Fix the black cardboard onto the card with double-sided adhesive tape. Write text on a metal tag and tie it onto the dragon’s "collar". Decorate with a red rhinestone eye if you wish.
Vai anche ad esplorare